Navigating Janeway
Navigating Janeway pageJaneway is made up of several distinct areas and how to navigate them depends on where you are, what you want to do, and what your role allows. This guide introduces each area, explains how to move between them, and points you to the pages that cover the interfaces listed.
This guide is written for editors and press managers who are working in Janeway for the first time. If you want to jump straight into processing articles, see the editor guide overview.
In this guide
In this guide section- The three areas of Janeway
- Navigating the journal and press website
- Navigating the back office
- Navigating press-level pages
- Navigating a repository
- Navigating the admin area
- What to read next
The three areas of Janeway
The three areas of Janeway sectionJaneway has three distinct areas, knowing which one you are in makes will make easier to find what you need.
-
Web content
Also called the front end. This is the public-facing website that shows articles, the homepage, and any other content you want to share with visitors. It also displays information such as author guidelines, editorial policy, and submission guidance. -
The back office
This is the part of Janeway you see when you sign in. Here you process articles through review, copyediting, and typesetting, configure workflows, and manage the journal more broadly. Journal settings, journal styling, user information, article metadata, and email templates are all reached from here. -
The admin area
This area is intended for system administrators and advanced users. From here you can inspect data and settings, edit records directly, and troubleshoot problems.
Caution
Changes made in the admin area bypass the checks built into the rest of Janeway. If you are not comfortable working there, contact your system administrator or support contact instead.
What you can see in each area depends on your roles and permissions. For more information, see Roles and permissions on Janeway.
Navigating the journal and press website
Navigating the journal and press website sectionThe navigation bar
The navigation bar sectionVisitors move around the journal or press website using the navigation bar (navbar) at the top of every page. The navbar combines fixed elements supplied by Janeway, such as Home, Articles, and Issues, with custom items you can create.

To enable, disable, reorder, or add navigation custom items, see Navigation.
The footer
The footer sectionThe footer carries information that belongs on every page, such as a privacy policy and accessibility statement.
Footer navigation is configured at press level and applies across all journals. To set it up, see Journal footer.
Moving from the website to the back office
Moving from the website to the back office sectionWhen you are signed in, an account icon appears in the top-right corner of the page. It shows either your initials or your profile picture(if you have set one).
- Select Account, or the circular icon showing your initials/profile picture.
- From the dropdown, select where you want to go.
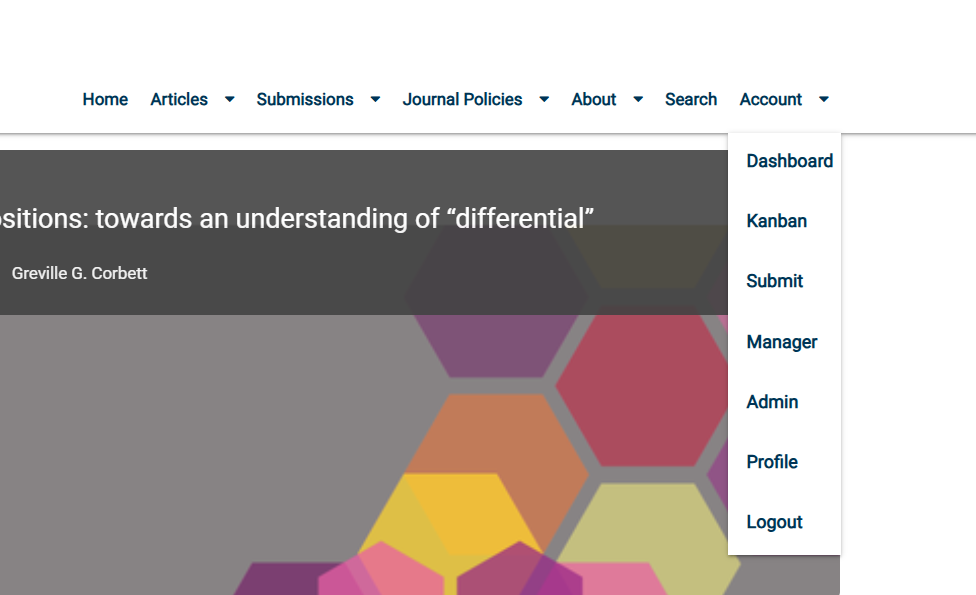
The dropdown can display options for the dashboard, the manager interface, your profile, the submission portal, and the admin area. Which of these are visible to you will depend on your roles and permissions.
Tip
To return to the public website from anywhere in the back office, select the journal name or logo at the top of the page.
Navigating the back office
Navigating the back office sectionThe back office is visible only to signed-in users and different users see different parts of it. Editors, journal managers, and users with staff permission can access the broadest range of views and interfaces. Reviewers, copyeditors, typesetters, and proofreaders see only the tasks assigned to them.
Unlike the public website, the back office cannot be styled or rebranded.
The dashboard
The dashboard sectionThe main journal dashboard is your starting point. It shows the articles in the journal workflow that are relevant to you. The editor block groups by the stage they have reached and the other blocks will show tasks assigned.
Information about articles in the journal workflow is available in other views as well, listed under the Dashboards section of the sidebar:
-
Main
The standard workflow dashboard, organised by stage. -
Kanban
A board view of every article in the workflow, with a column for each stage. -
Search submissions
A filterable list of active submissions, useful when you know what you are looking for.
The sidebar
The sidebar sectionThe sidebar runs down the left of every back office page and is the quickest way to move between stages, the management dashboard and article lists. You can reach any stage from anywhere in Janeway, without returning to the dashboard first.
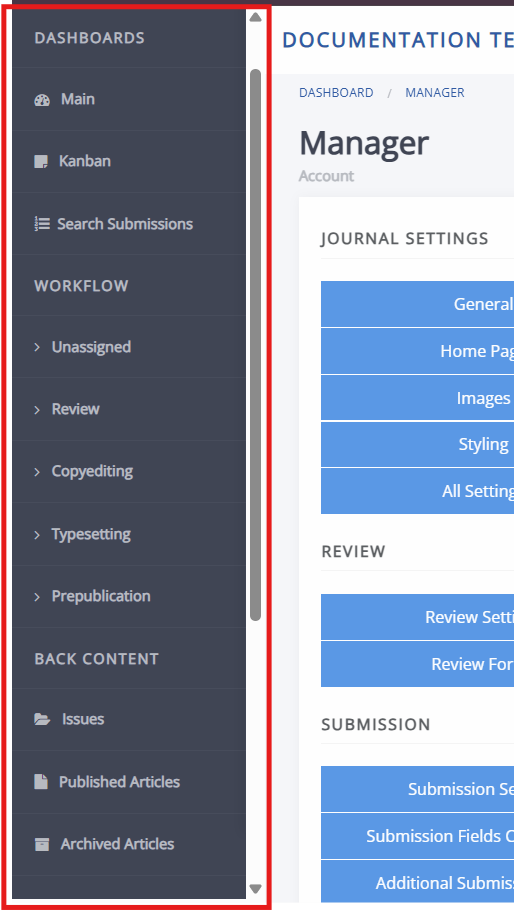
The sidebar is divided into four sections. What appears in each one depends on your roles and permissions, and on how your workflow is configured.
-
Dashboards
Contains Main, Kanban, and Search submissions, described above. -
Workflow
Links to each stage in your journal's workflow. A typical journal shows Unassigned, Review, Copyediting, Typesetting, and Prepublication. If your journal is configured to skip a stage, it does not appear here. For what happens at each stage, see the Editor guide. -
Back content
Covers material that has left the workflow. Issues opens the Issue manager, Published articles lists everything you have published, Archived articles lists rejected and archived submissions, and Publication schedule lists articles scheduled for publication. -
Staff
Manager opens the manager dashboard, Plugins lists the plugins installed for the journal, Workflow opens the page where you configure your journal's workflow elements, and All articles list shows every article regardless of status. The All articles list page also lets you export a list of articles or upload a CSV of metadata updates. Access to these pages depends on your permissions.
The manager dashboard
The manager dashboard sectionThe manager dashboard lists the settings used to configure the journal. It is visible to editors, journal managers, and users with staff permission. It is reached by selecting Manager under Staff in the sidebar or from the profile dropdown in the top-right corner.
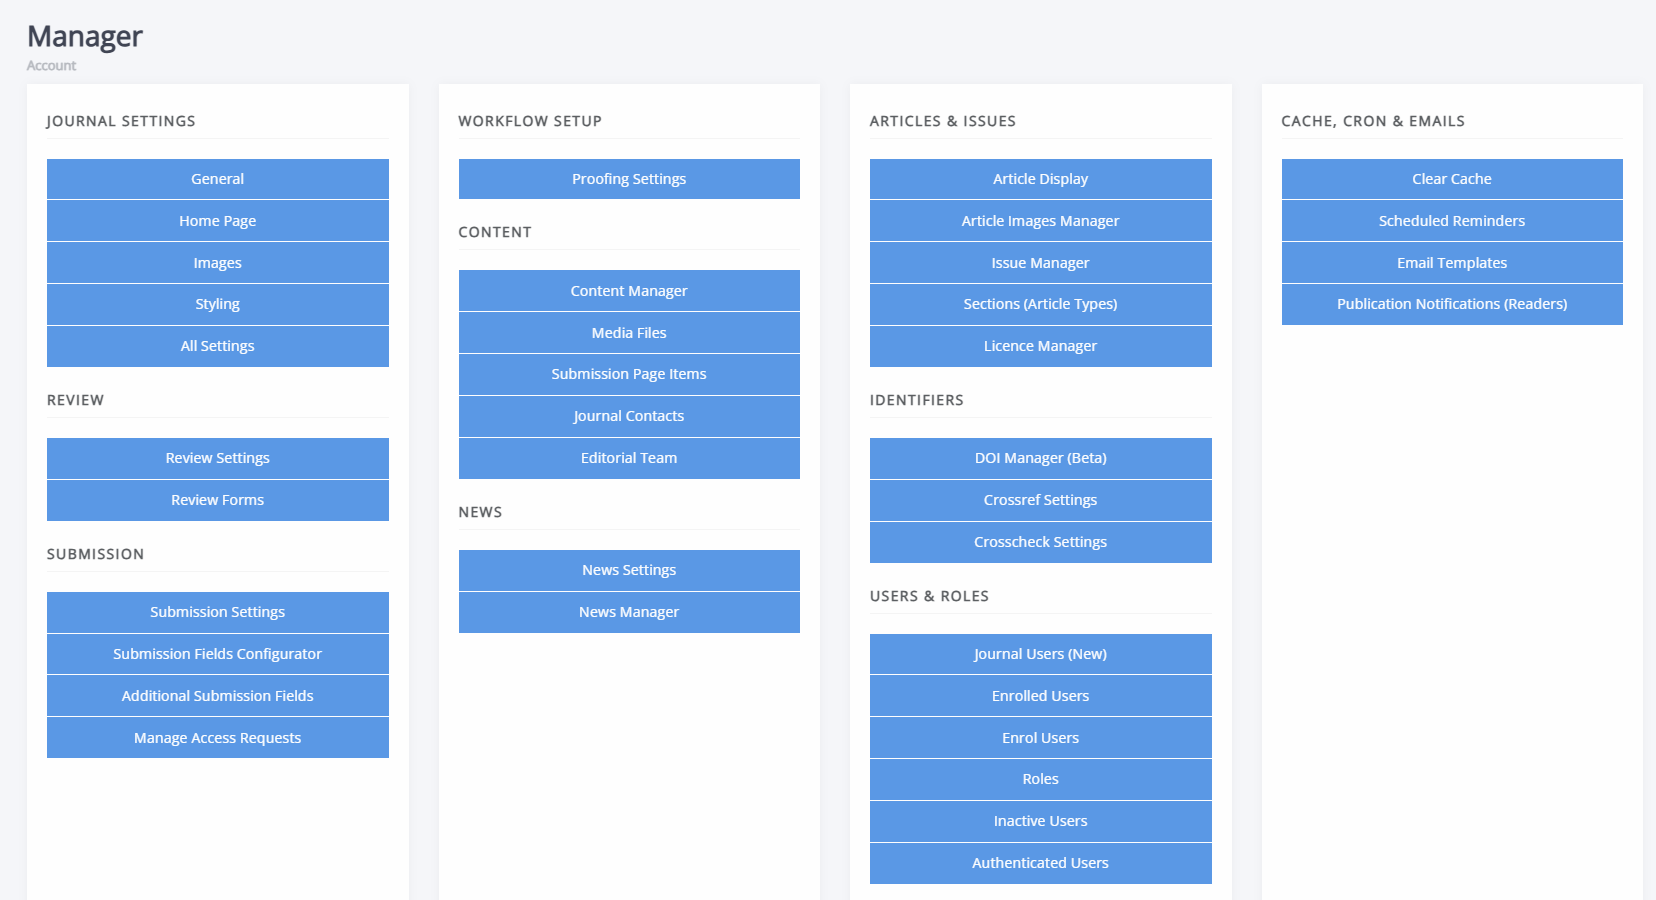
Settings are grouped into panels by what they control. See also Journal management for further documentation on this area.
-
Journal settings
General settings, homepage layout and elements, journal default images, and All settings, which searches every setting available on the journal. -
Review
Settings related to configuring the review process. See also Review. -
Submission
Settings related to configuring the submission process and the submission page. See Submissions. -
Content
The content manager, editorial team page settings, journal contacts, media files, and submission page items. -
News
The news manager and its associated settings. -
Articles and issues
Article display options, the issue manager, article images, sections, and the licence manager. -
Identifiers
The DOI manager, Crossref settings, and Crosscheck settings. See Identifiers. -
Users and roles
Journal user management. See Accounts and roles. -
Cache, cron, and emails
Clearing the cache, scheduled reminders, email templates, and publication notifications.
Tip
If you cannot find a setting in the interface, open All settings from the Journal settings panel and search for it there.
Navigating press-level pages
Navigating press-level pages sectionIf you manage more than one journal, some tools sit above journal-level in the Press manager. This page is available to users with staff permission and covers press-wide details, all journals' and press' users, and journal-level defaults.
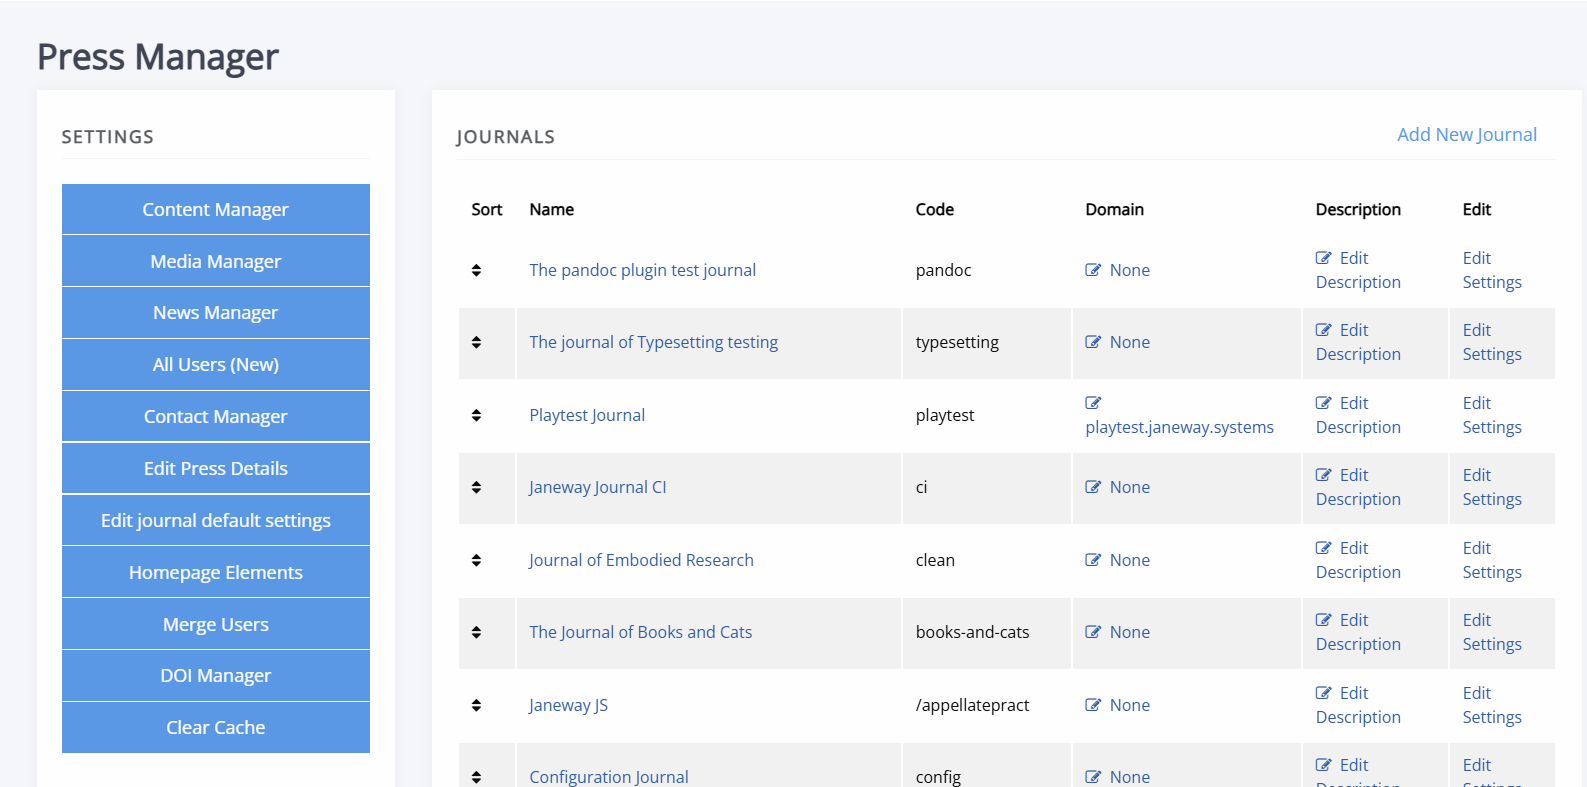
From the press manager you can do the following:
- Configure the press website, including press settings; including the press homepage, content manager, news manager, and contact manager.
- Add journals, reorder how they appear in the journal list, edit the description shown for each journal, and access a journal's settings. See also ournal management at press level
- Manage users across every journal from the All users interface, filtering by activity, staff status, role, and journal.
- Merge duplicate user accounts through the Merge users interface.
Some settings are worth setting once at press level rather than journal by journal, including DOI settings, review guidelines, copyright submission labels, the default theme, and publisher details. For guidance, see Journal management at press level and managing users at press level.
Navigating a repository
Navigating a repository sectionJaneway can host repositories for preprints and similar material alongside journals on the same press. Repositories have their own manager, rather than sitting inside a journal's back office.
If your press has repositories enabled, you can find the repository list underneath the journals list of the press manager. From there you can access, manage and configure your repository.
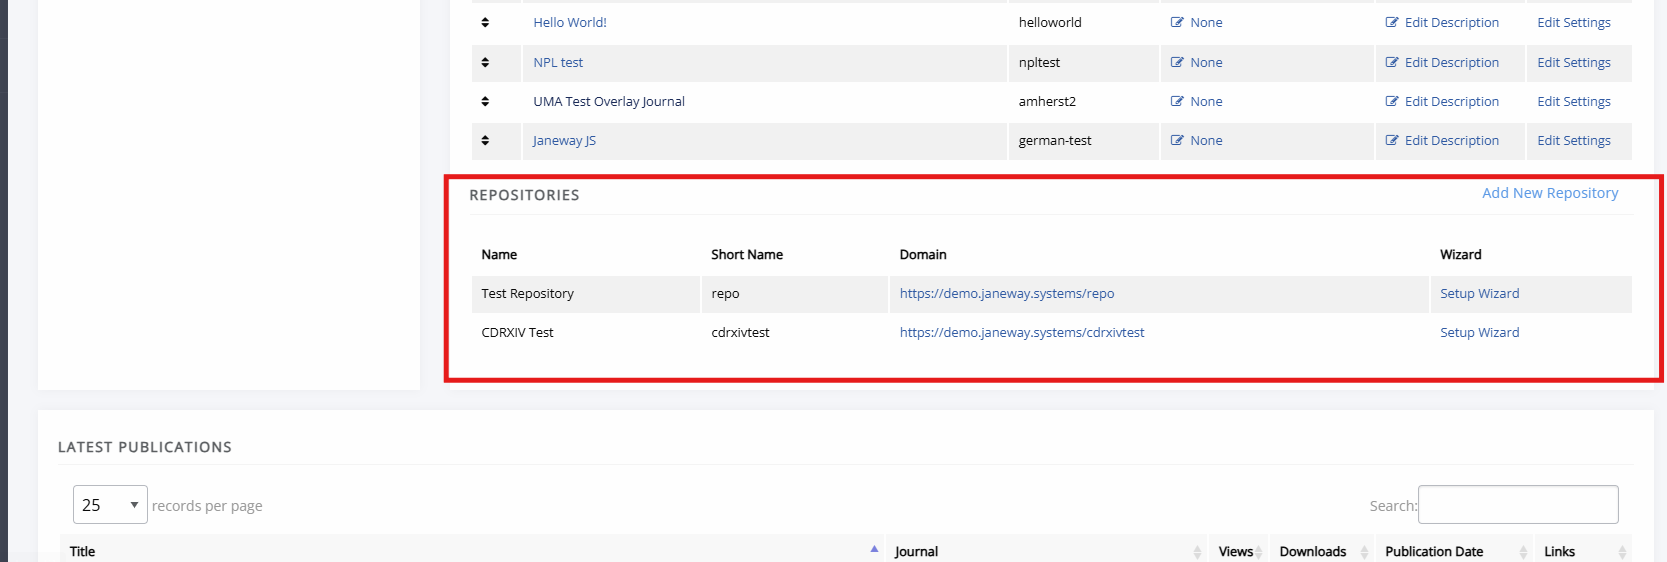
See Repository documentation for more information on repositories.
Navigating the admin area
Navigating the admin area sectionThe admin area is Janeway's underlying database interface. To open it, select the account icon in the top-right corner and then select Admin. It is available to users with staff permission.
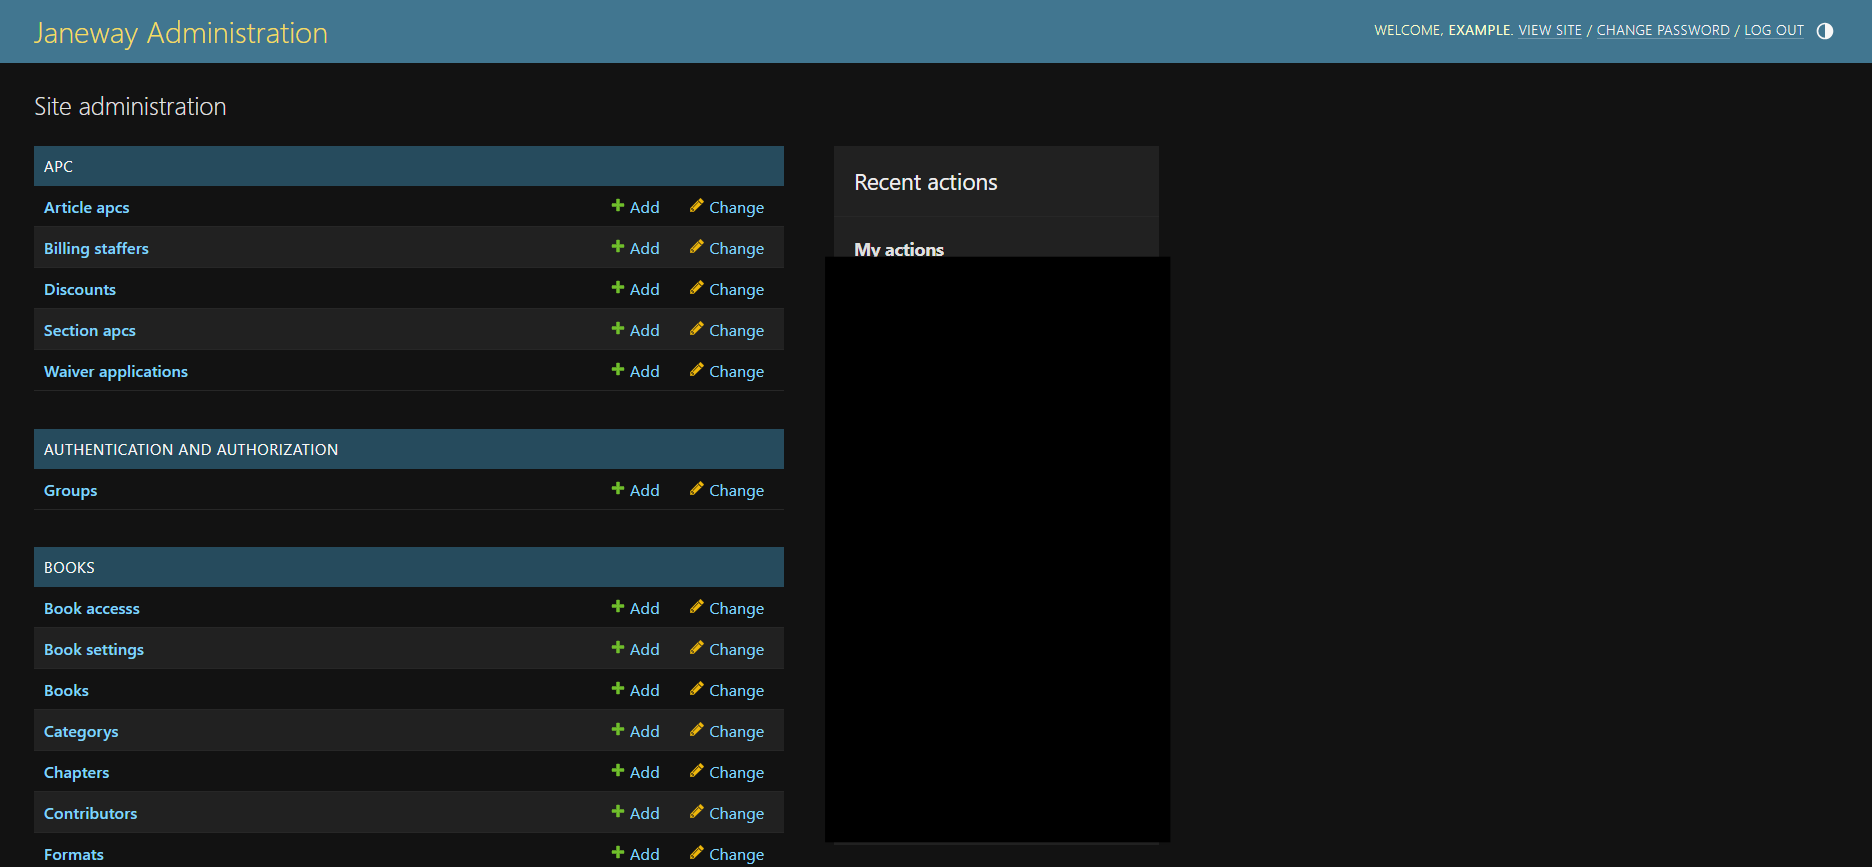
There are two key things to consider when using the admin area:
-
It is organised into tables that mirror the database structure, grouped by the part of Janeway they belong to. This ordering comes from the software architecture itself and cannot be rearranged. For more information on the technical aspects of the admin interface and how it works, see the Django admin site documentation.
-
It edits records directly. The validation, permission checks, and email prompts built into the back office do not apply here. It also does NOT have an option to undo work and deletions from the admin are are permanent. Most editorial work never requires the admin area, but there examples of tasks done through admin include:
-
Core > Settings
Adjust which roles can view and edit an individual setting, using theeditable_byfield. See Granular settings permissions. -
Core > Accounts
Inspect an account record when troubleshooting a sign-in problem. See Account troubleshooting. -
Journal > Journals
Check a journal's code and domain configuration when links resolve unexpectedly. This is also where you can change a journal code, if needed -- this will break existing links to a journal in path-mode.
Caution
Edits made in the admin area take effect immediately and are not reversible. If you are unsure about a change, contact your system administrator before you make it.