Editor guide to typesetting
Editor guide to typesetting pageThis stage covers typesetting and proofreading of typeset files. This guide will provide the following information:
- An outline of the typesetter page.
- Information on files relevant to typesetting.
- An overview of the three types of typesetting workflows.
- An overview of the proofing workflow.
- Information on managing typeset files.
- Managing image and figure files..
The typesetting stage
The typesetting stage sectionThe typesetting overview screen shows all articles in typesetting, with their status. You can Claim an article to indicate who is managing its typesetting (this doesn't restrict other editors' access). To see all your claimed articles, use the filter in the top-right corner to show only My assignments.
After selecting an article, you will be taken to the typesetting page. This page is divided into blocks:
-
At the top, you can see the rounds which are used for both typesetting and proofing, similar to the peer review page. From here, you start rounds and assign typesetters and proofreaders.
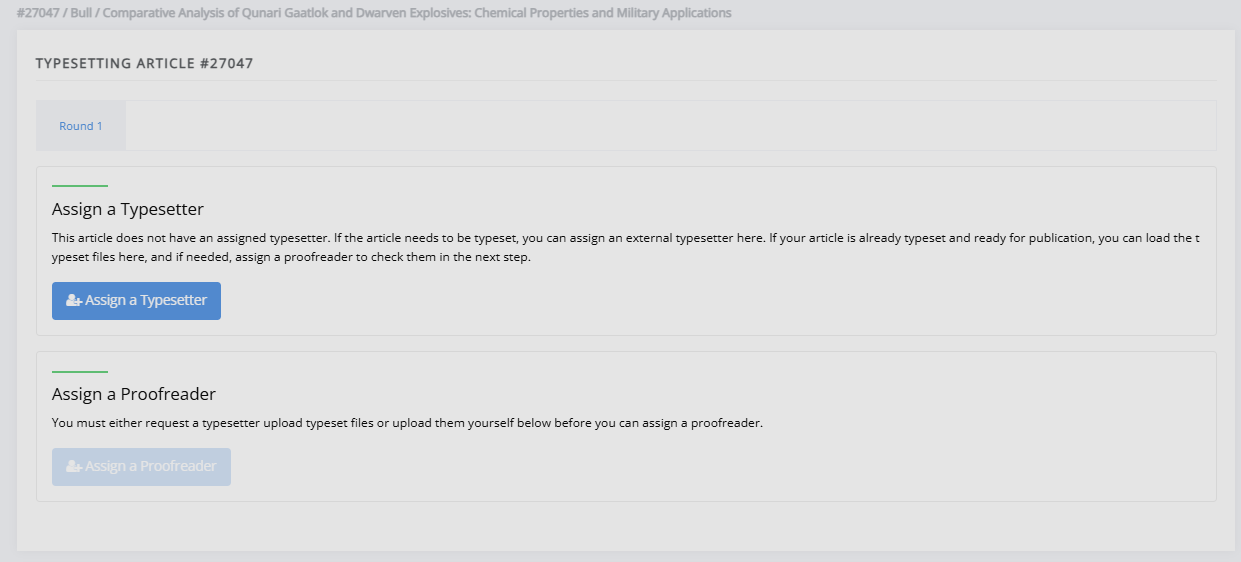
-
Under this, there is Files for typesetting where files used in typesetting are listed - this includes manuscript files, images and any pre-existing galleys.
-
This is followed by Galleys, which lists typeset files (galleys) which will become available to readers.
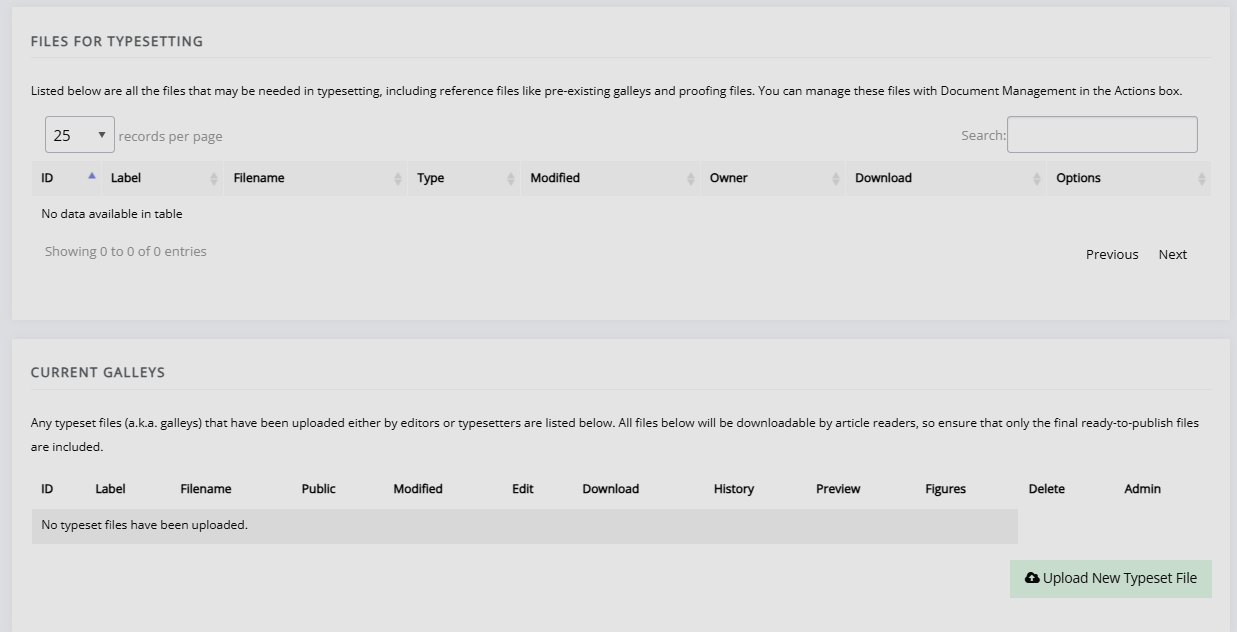
-
Finally, Optional files contains the supplementary files (data files, appendices, etc.) and (if using) source files (intermediate files used by typesetters, e.g. Adobe InDesign files).
-
The Actions block, where you can start new rounds or complete typesetting, is on the right-hand side - similar to the peer review and copyediting stages.
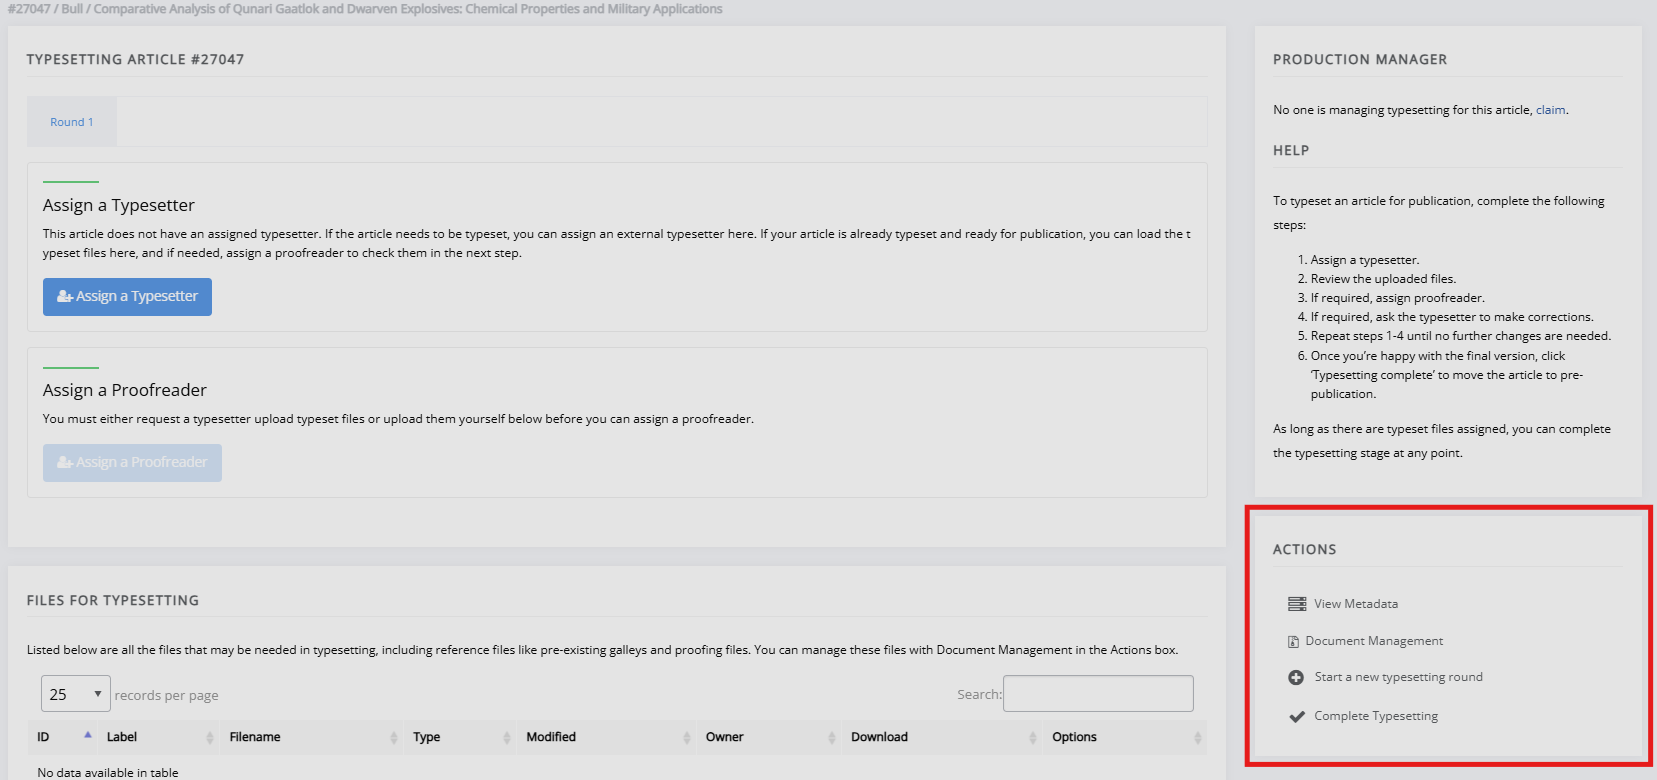
You can see the typesetter's view and their experience of the workflow in the typesetter guide.
Typesetting files
Typesetting files sectionGalleys are typeset files used for proofing and displaying content. Typeset files typically include, but are not limited to:
- PDF files
- HTML files
- JATS-XML files
All typeset files will become available for download from the article page once the article is published. Janeway can display JATS XML or HTML galleys and list other formats as downloads.
File labels
File labels sectionWhen uploading typeset files, Janeway will ask you to set a label. The label will be displayed publicly in the option to download a file as 'Download [label]'. So if you set the label as 'PDF', it will be 'Download PDF'.
Labels can also be used to denote the language of a file to readers. For instance, labelling a PDF file as 'PDF (EN)' and another as 'PDF (ES)' will allow readers to download the correct PDF for their language.
For PDF, XML and HTML files, Janeway can automatically set the label to the file type if left blank. For other filetypes, it will default to 'OTHER' if left blank.
Supplementary files
Supplementary files sectionAuthors can upload supplementary files to Janeway as part of their submission, such as data files or appendices. If the intention is to host the file on Janeway (as opposed to an external repository, e.g. FigShare or Zenodo), editors can create a supplementary file and assign it a DOI within Janeway. This option is found at the bottom of the page, under Optional files. If the file isn't already uploaded to Janeway, you can opt to upload a new file.
You should set the supplementary file in advance of sending the article for typesetting, where possible, and notify the typesetter (if you use external typesetters). They will be able to see the file record and the DOI that has been assigned to it.
Upload galleys yourself (workflow)
Upload galleys yourself (workflow) sectionIf you do not use a typesetter or file conversion through Janeway, you can upload typeset files yourself by clicking Upload new typeset file in the Current galleys section. Once you have selected a file, you can also mark whether the file will be public upon publication and set its label.
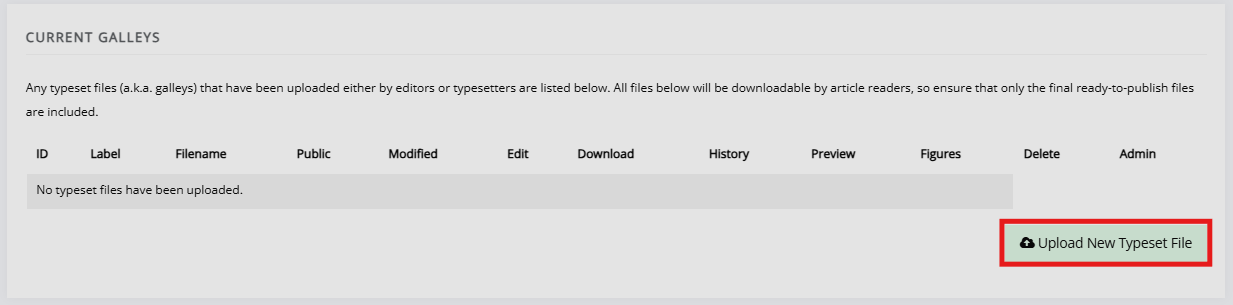
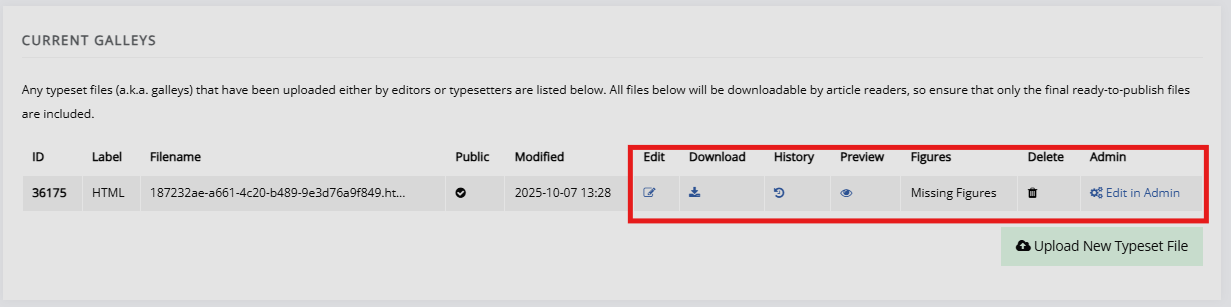
When uploading an HTML or XML file with images, they must be uploaded separately, as HTML and XML files do not contain the images themselves (like a DOCX or PDF file might). Images can be uploaded by clicking the  Edit icon and using the upload functions on the page it leads to, for more information see: Images and figure files. You can also
  Download the file or
  Preview it, using the respective icons.
Caution
Do not use the image or galley upload for supplementary files. See Supplementary files for more information.
Generating typeset files with Janeway (workflow)
Generating typeset files with Janeway (workflow) sectionJaneway also offers the option to convert manuscript files using the Pandoc plugin, which can generate HTML galleys from a MS Word document. For a full guide on how to manage typesetting with Pandoc, see Typesetting with Pandoc.
If you are interested in using the Pandoc plugin, contact your System administrator.
Working with a typesetter
Working with a typesetter sectionThis section outlines how to work with an external typesetter, including assigning tasks, reviewing their work, and assigning revisions (if needed). You will need to set up an account for your typesetter. If you have not done this yet, see Account Management for more information.
Assigning a typesetter
Assigning a typesetter sectionClick Assign a typesetter to open the typesetter assignment page and start a new typesetting assignment.
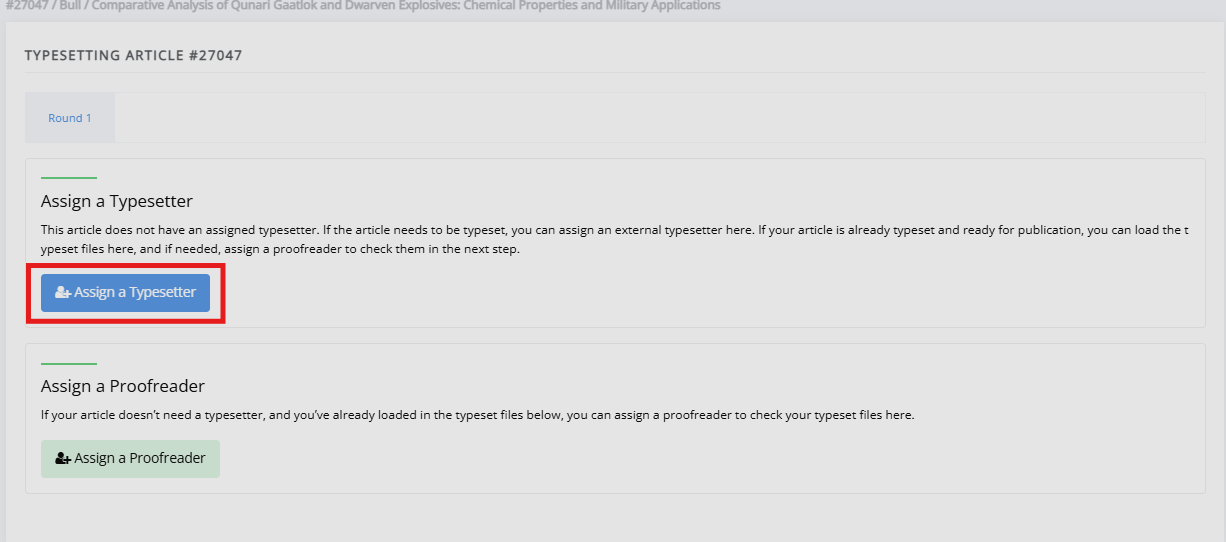
You can now do the following:
- Select a typesetter.
- Select the files you would like this typesetter to work on. If any galleys are already uploaded, you can select galleys for correction as well.
- Set a due date.
- Add any notes, e.g. what file types you would like.
- Send a notification email to the typesetter (or skip this step).
Tip
You can customise the typesetting instructions through the typesetting guidelines setting, in order to avoid having to repeat instructions in the notes box on every typesetting assignment.
If no issue has been set yet for this article, you can do this now. Typesetters may need this information (especially if working with JATS-XML).
There is no limit on the number of typesetters you can assign at one time.
Tip
Typesetters automatically access all images/figure files uploaded by the author and the article metadata. Verify metadata is production-ready via Actions > View metadata before assignment.
Reviewing the typesetting task
Reviewing the typesetting task sectionOnce the typesetter has completed their task, you will receive an email notification.
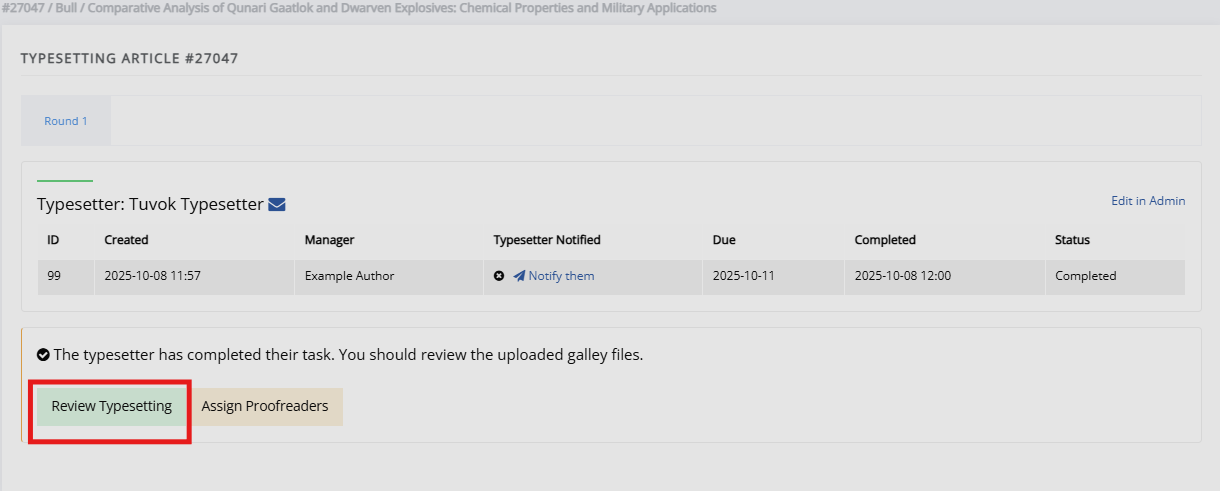
You can now review the typesetting task and select one of the following three options:
- Request corrections
If you notice a problem with the typeset files straight away, you can request corrections to the typesetter. See Requesting corrections. - Proofing required
Accept the typeset files and record the decision to send the files for proofing. - Accept
If no (further) proofing or corrections are required, you can accept the files and end the typesetting stage.

Proofing
Proofing sectionThis part of typesetting is used to check galley files for any issues before they are published. This involves sending the files provided by the typesetter to the authors, and potentially other editors, for proofreading. Janeway allows you to create a proofing task, where authors and/or editors can be invited to proof the typeset files.
Requesting proofreading
Requesting proofreading sectionOnce a typeset file has been uploaded by either a typesetter or editor, proofreading will become available.
Click Assign proofreaders to open a new proofing task.
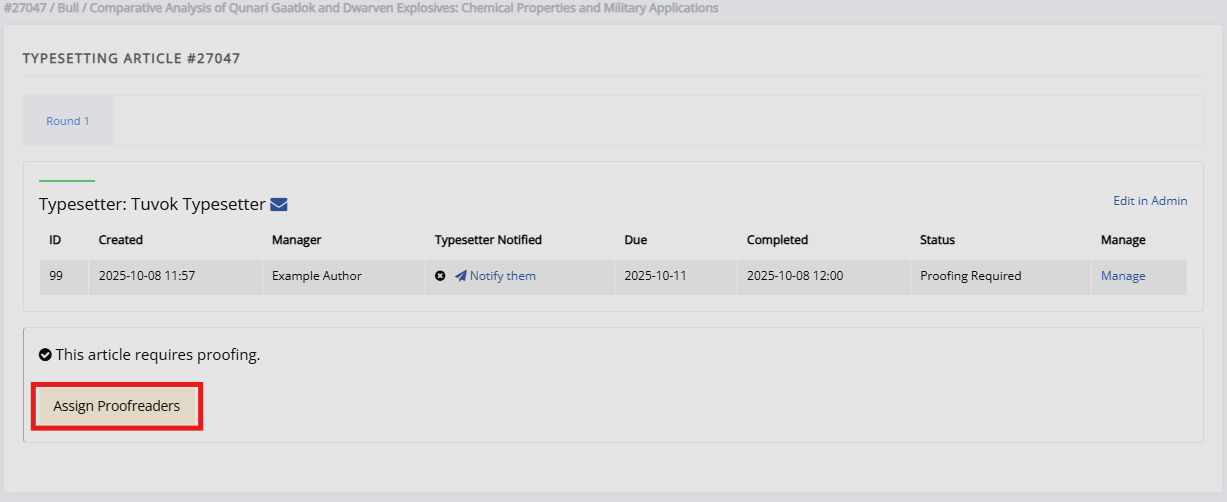
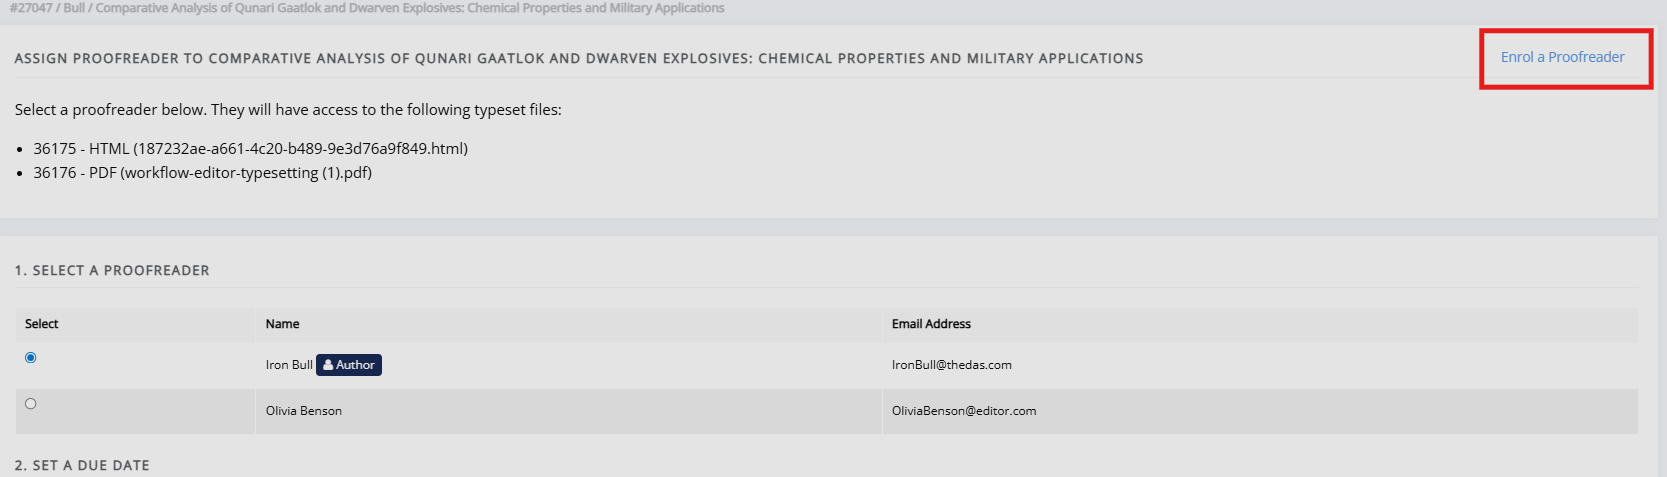
All files listed under Current galleys will be made available to proofreaders. You can now do the following:
-
Select the proofreader.
The list of potential proofreaders is made up of editors, the authors of the paper and any other users with the proofreader role. You can only select one proofreader, but you can add multiple assignments. If you wish to select a user who is not displayed in the list, click Enrol a proofreader.
-
Set a due date.
-
Provide instructions for the proofreader.
After completing this, you can optionally email the proofreader with information about their task.
Proofing assignments can still be edited before the proofreader accepts them, in case you have assigned the wrong file or set the wrong date. You will have the option to edit it using the Actions drop-down. You can change the galleys, the due date and the note to the proofreader. There is also a Delete button that will completely remove the assignment, though information is retained in Janeway's logs.
Reviewing a proofing task
Reviewing a proofing task sectionOnce proofreaders have finished their task, you can review their feedback and any uploaded annotated documents by clicking Manage on the proofreader assignment.
The review page will list the galleys that have been proofed and displays the proofreader's feedback. If the proofreader uploaded an annotated document, you can also view it on this page.
If no further corrections are needed, you can click Complete typesetting under Actions to finish typesetting and move the article to prepublication.
If you require corrections, click Request corrections.
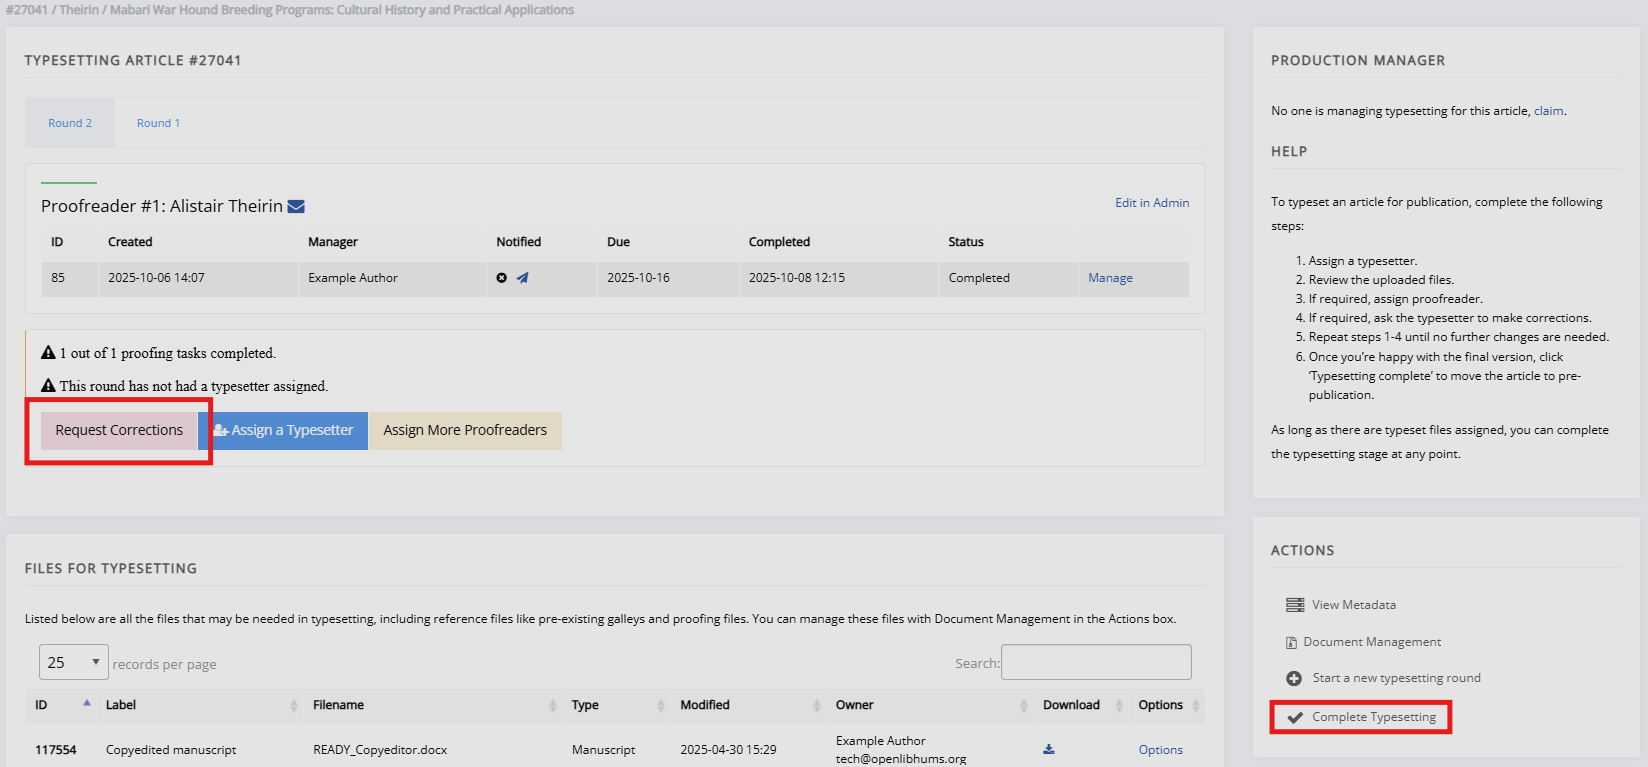
Requesting corrections
Requesting corrections sectionYou can now assign a typesetter to correct issues that were flagged in proofing, as outlined in Assigning a typesetter. In addition to the previous steps, you can now also do the following:
- Provide the typesetter with an annotated document, if one was provided.
- Select the galleys that require corrections.
- Share feedback from the proofreader(s).
Tip
When requesting corrections, it is recommended to specify the corrections in the notes to the typesetter in addition to what the proofreaders have provided, especially in cases where proofreaders request contradictory corrections.
Managing typesetting files
Managing typesetting files sectionOnce typeset files are uploaded into Janeway, they become manageable within the system. To manage a typeset file, click the Edit icon next to it.
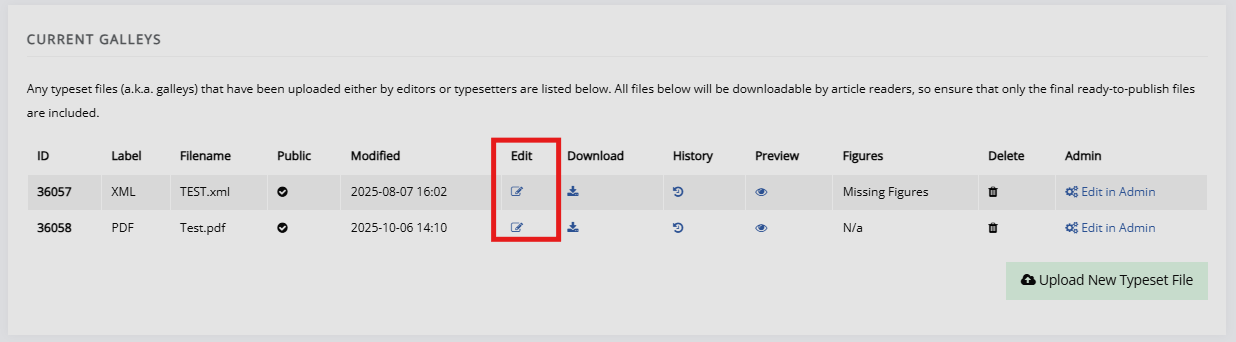
On this page, you can do the following:
- Replace the typeset file; the old file will be retained in the file history.
- Edit the file label.
- (Un)mark the file as public.
- Manage image files.
- Manage CSS files.
- Manage XSL files.
Image and figure files
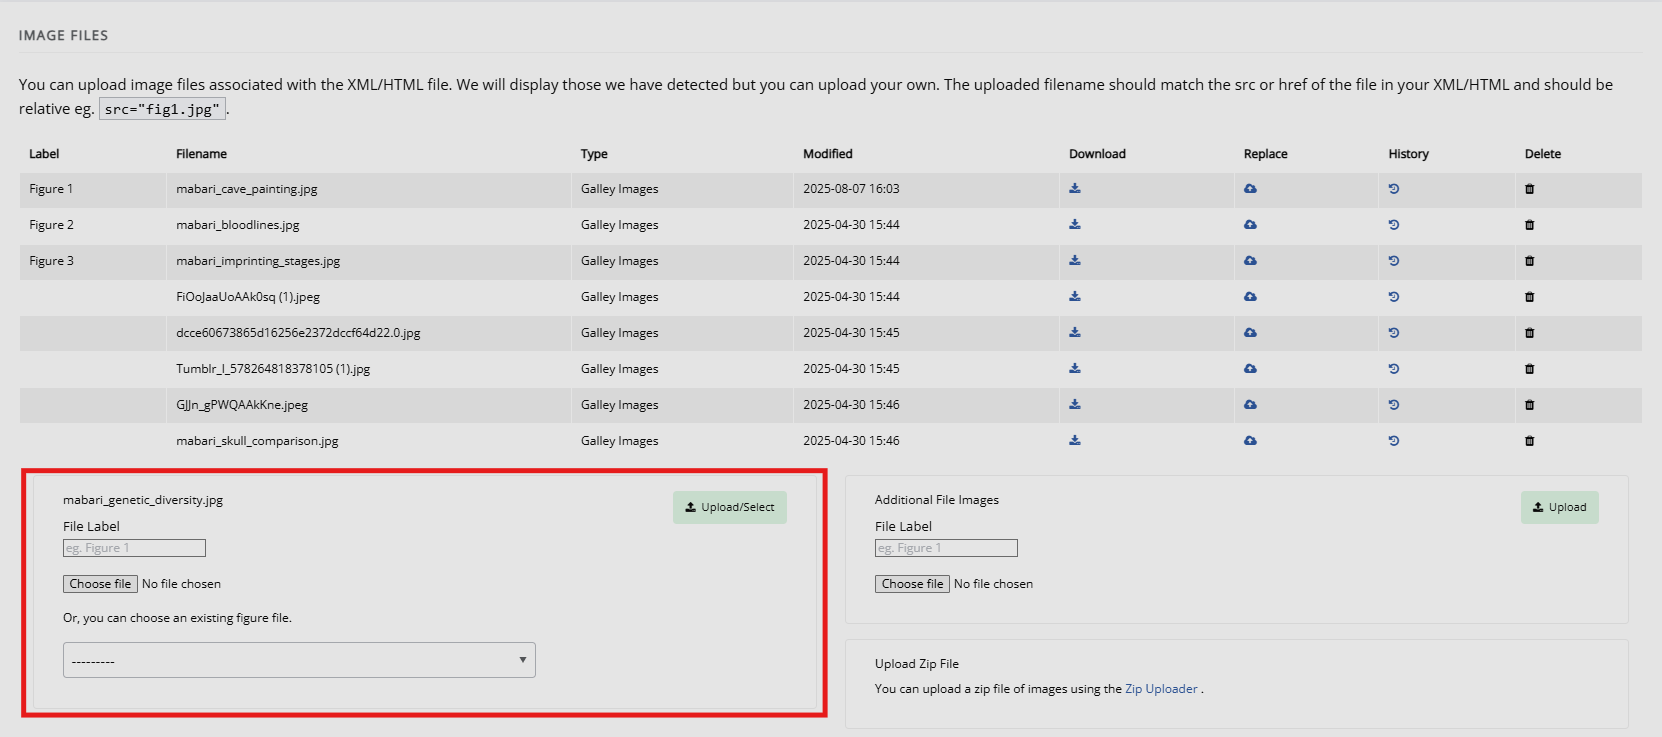
Image and figure files sectionHTML and XML files uploaded to Janeway will be scanned to detect graphic, figure or img tags. If no image file matching the tag is found, Janeway will display a missing image warning on the main typesetting page. You can load up images against a typeset file by clicking Edit on the typeset file and scrolling to the Image files section.
For each missing image file, Janeway will present you with a block where you can either upload a new image file or select an existing one from the images already linked to the article.
Tip
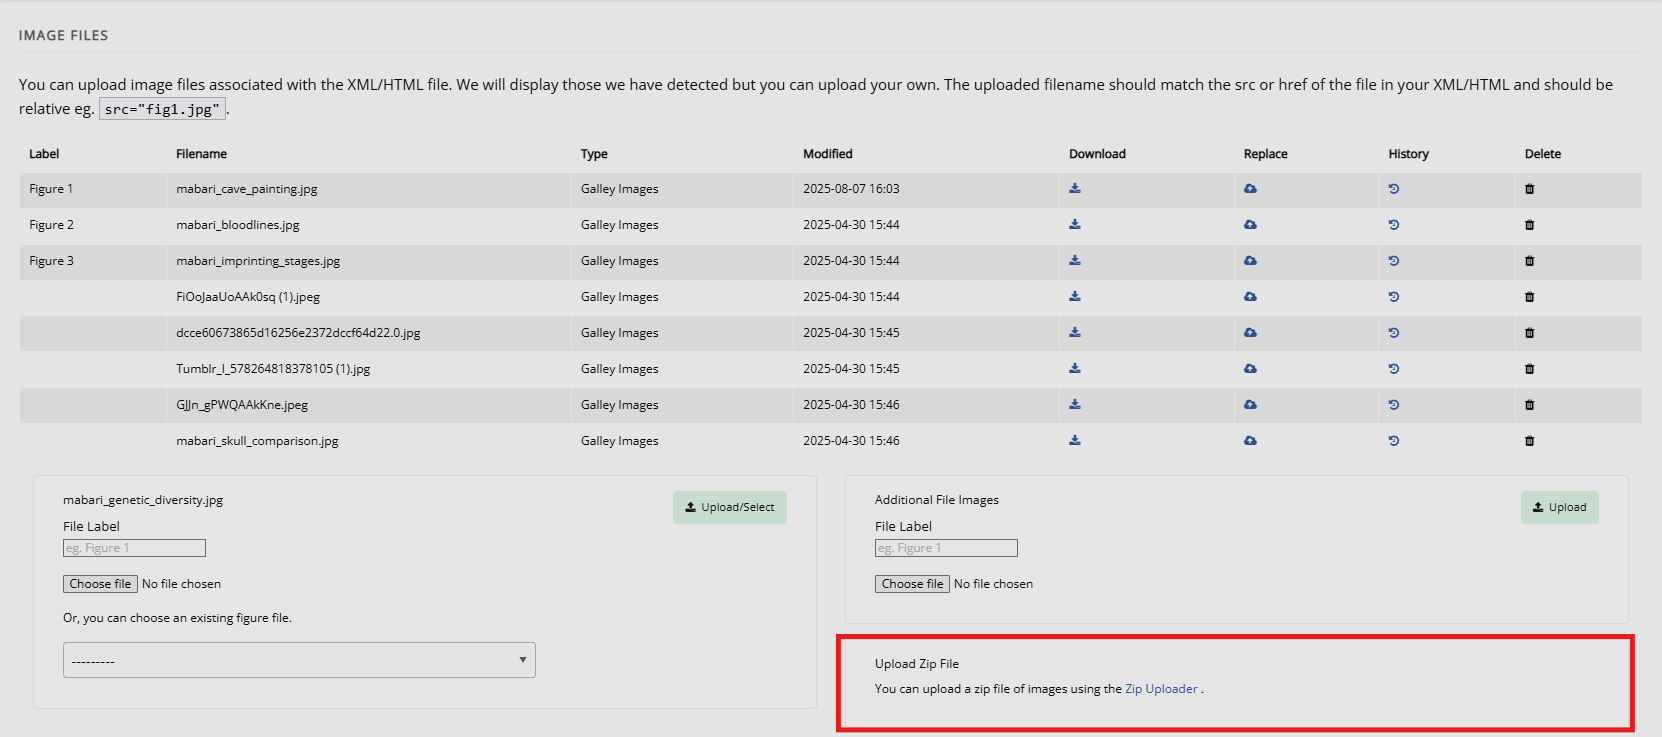
For typeset files with a large number of images, you can also create a ZIP file containing all the images and upload it using the ZIP uploader. Janeway will match the images against the tags in the typeset files. Ensure the image names and file types are an exact match those in the typeset file.
Advanced styling
Advanced styling sectionThe following information is aimed at advanced users, comfortable with CSS / XSL. If a journal has special styling requirements and you are unable to address this yourself, contact your publisher or system administrator.
CSS file
CSS file sectionIf a given article requires special styling, you can upload a CSS file alongside it and Janeway will output it on the article page.
Warning
The CSS uploaded here must only target elements inside the <article> block, otherwise it could break general styling of the site.
XSL file
XSL file sectionJaneway's XSL Transformation process uses a version-controlled XSL (Extensible Stylesheet Language) file. When you upload a JATS XML file to Janeway it marks the file as using the current XSL file. This means that when changes are made to the XSL file it will only affect future files uploaded and not any back content.
Warning
Changing an XML file's XSL may cause it to render differently. It is only recommended that you do this before sending it for proofreading.
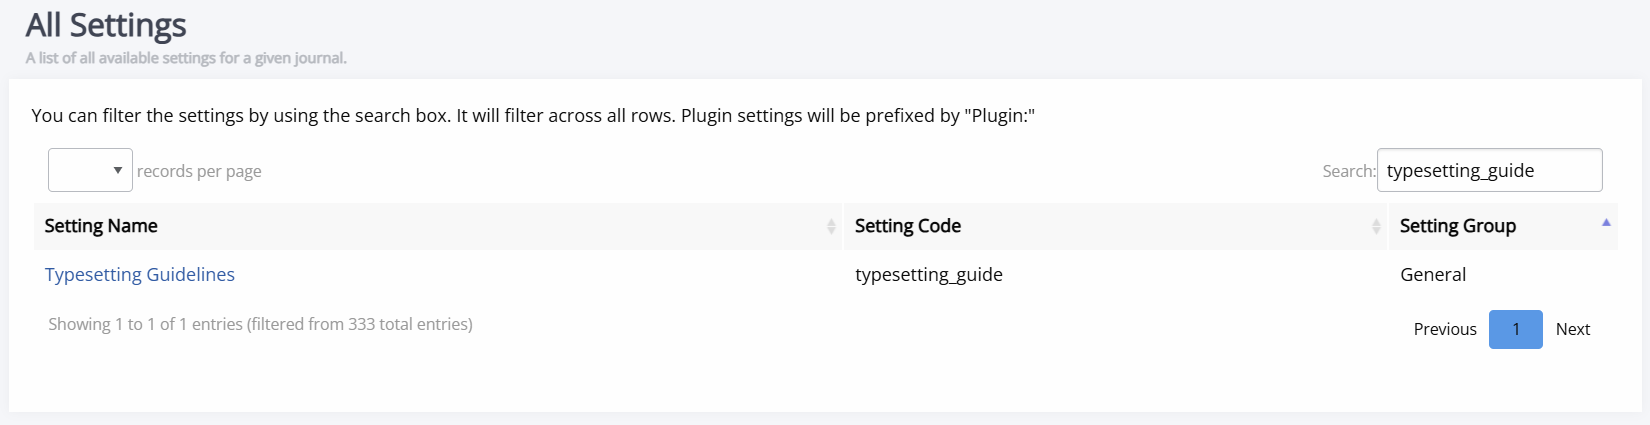
Typesetting guidelines setting
Typesetting guidelines setting sectionThe typsetting guidelines shown to the typesetters can be edited through the Typesetting guidelines setting. This setting can be found through All settings on the Manager dashboard.